Passbolt
Introduction
Section titled “Introduction”This document is intended to serve as a guide for new users who are joining WiMetrix.
Prerequisites
Section titled “Prerequisites”The link to access Passbolt is https://passbolt.wimetrix.com, which is accessible from anywhere.
Account Setup
Section titled “Account Setup”For first-time users, ask the DevOps Team to send you an invitation email to your company email. You will receive an email on your company email.
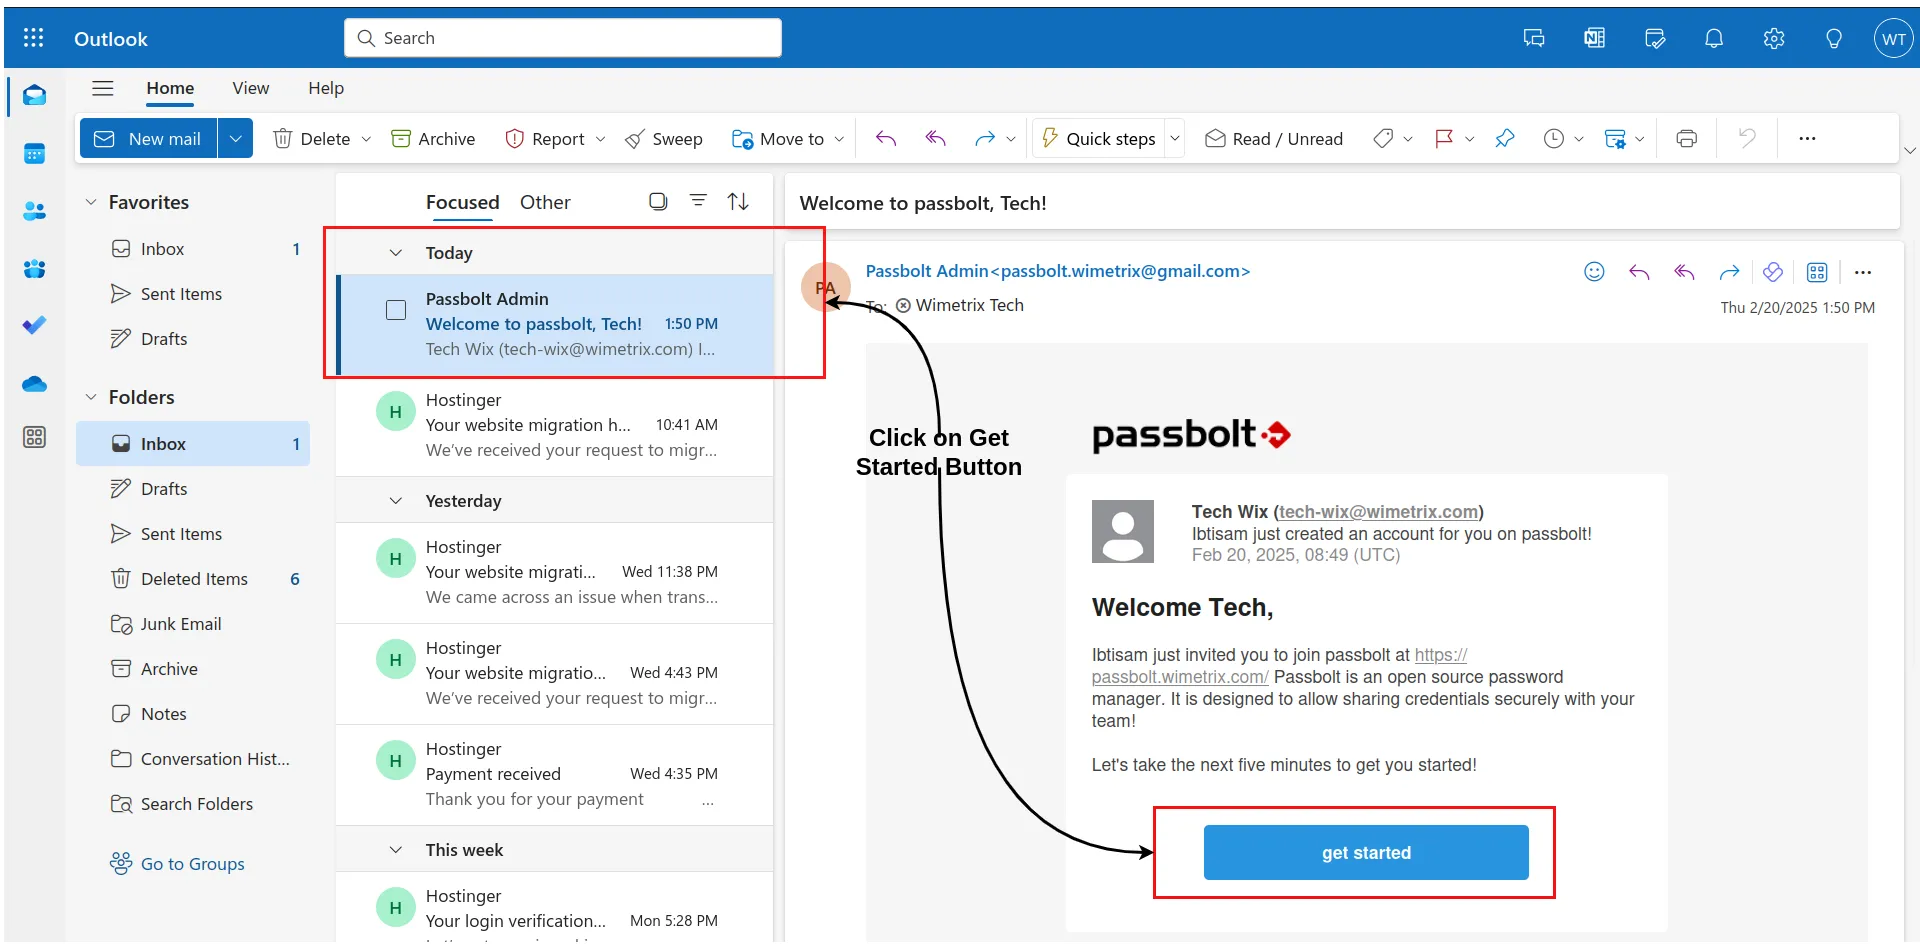
-
Click on “Get Started”.
-
Choose your password, which will be used the next time you log in to Passbolt.
-
Make sure to save the recovery key somewhere safe. The recovery key is used in case you need to recover your account.
-
Choose a security token.
-
You will be prompted with the Passbolt welcome screen.

Enable 2FA
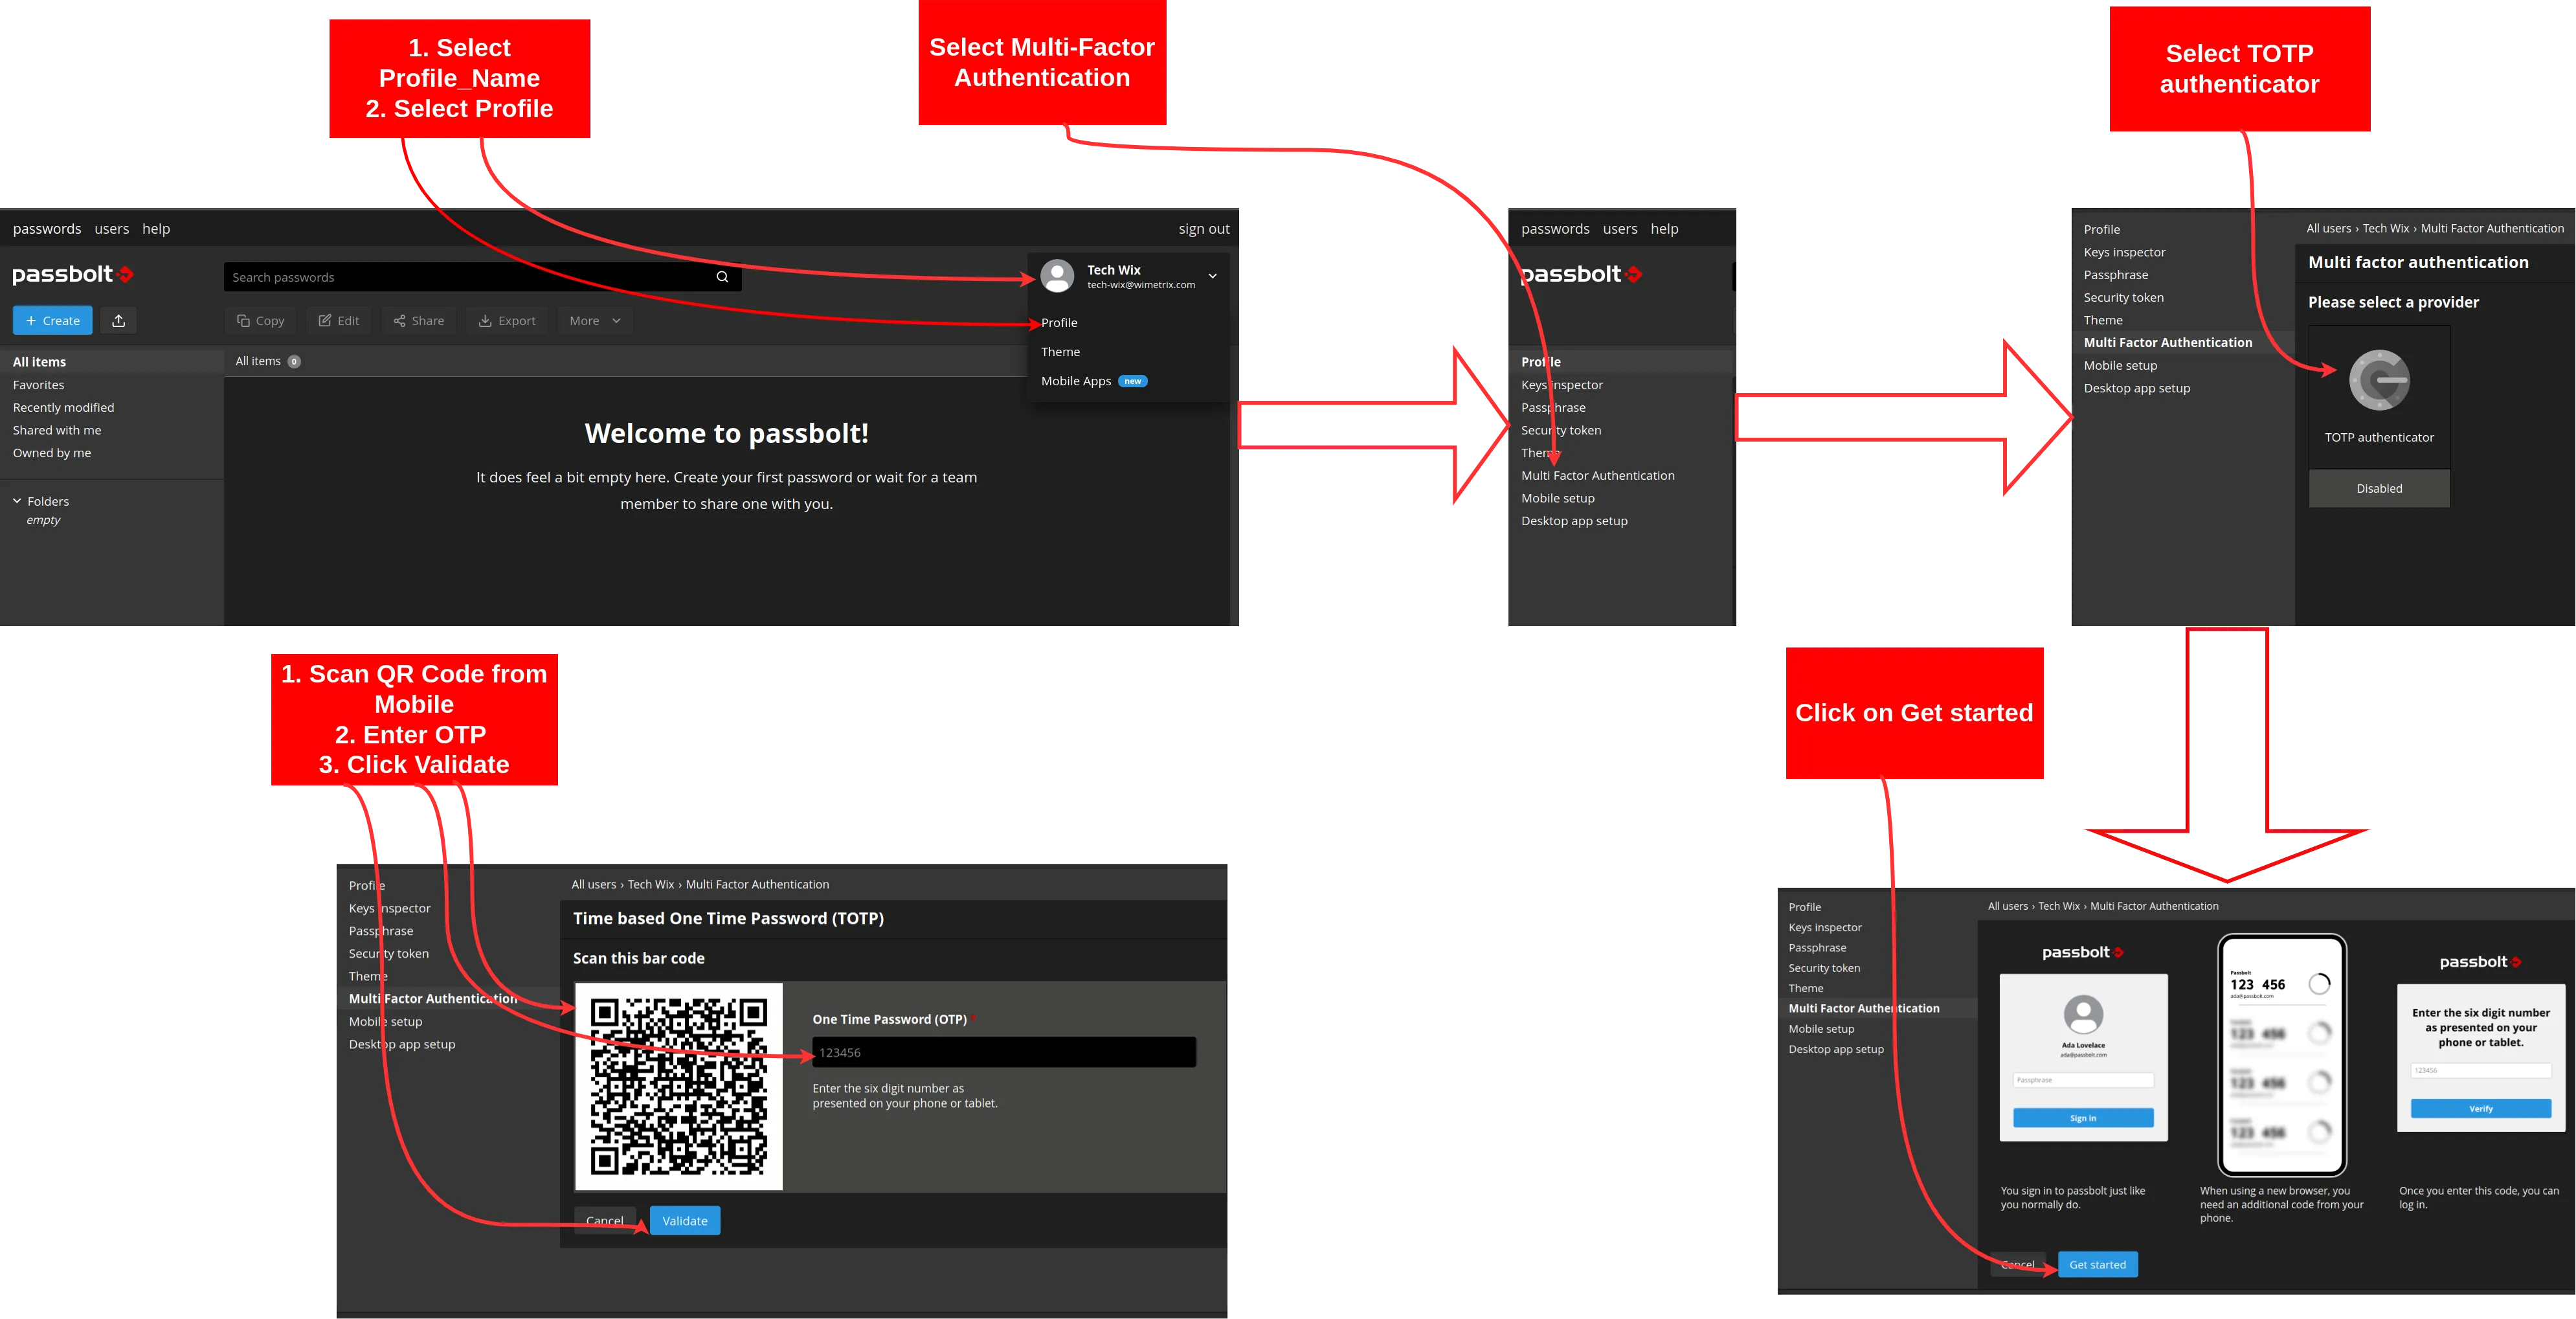
Section titled “Enable 2FA”It is important to set up 2FA for your account. To set up 2FA, follow these steps:
-
Click on your profile button in the top right, next to the “Sign Out” button.
-
Select “Profile”.
-
Select “Multi-Factor Authentication”.
-
Click on “TOTP Authenticator”.
-
Click on “Get Started”.
-
Scan the QR Code from your mobile device.
-
Once it is set up on the mobile Authenticator App, enter the OTP and click “Validate.”
Access AnyDesk and Server Credentials
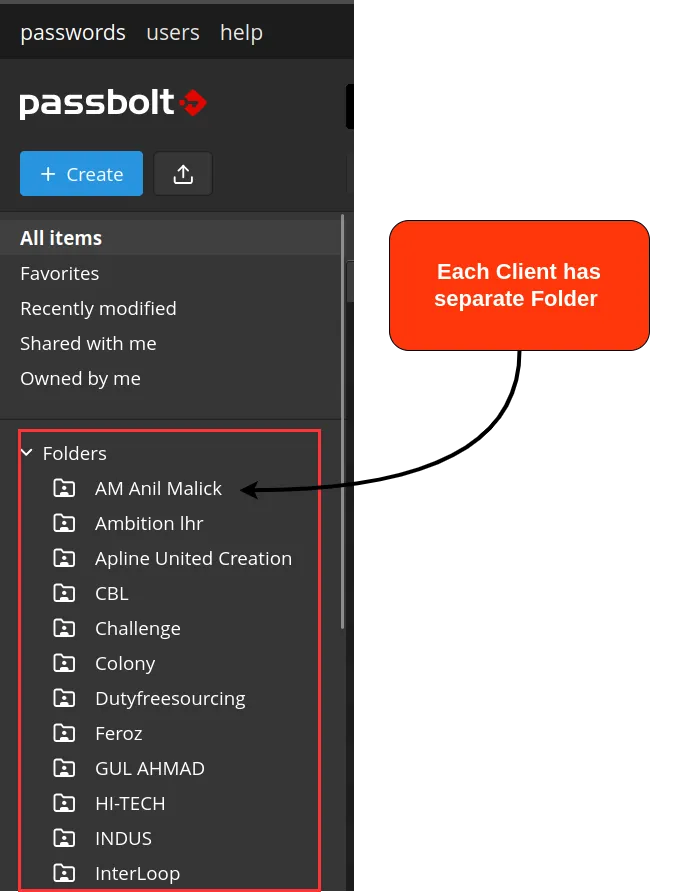
Section titled “Access AnyDesk and Server Credentials”For first-time users, ask the DevOps Team to add you to the proper group so you have access to Client AnyDesk Credentials.
Once you are added to a specific group, you can see the folders for each client on the left side of the Passbolt dashboard.
Every password is stored in the following manner:
-
First, you will see the
Nameof the password. -
Then the
Usernameof the password (left blank in the case of AnyDesk credentials). -
Then the actual
Passwordfor AnyDesk login. -
Then
TOTP, which is used in 2FA (will be blank in the case of AnyDesk credentials). -
Then
URL, which contains the AnyDesk address.
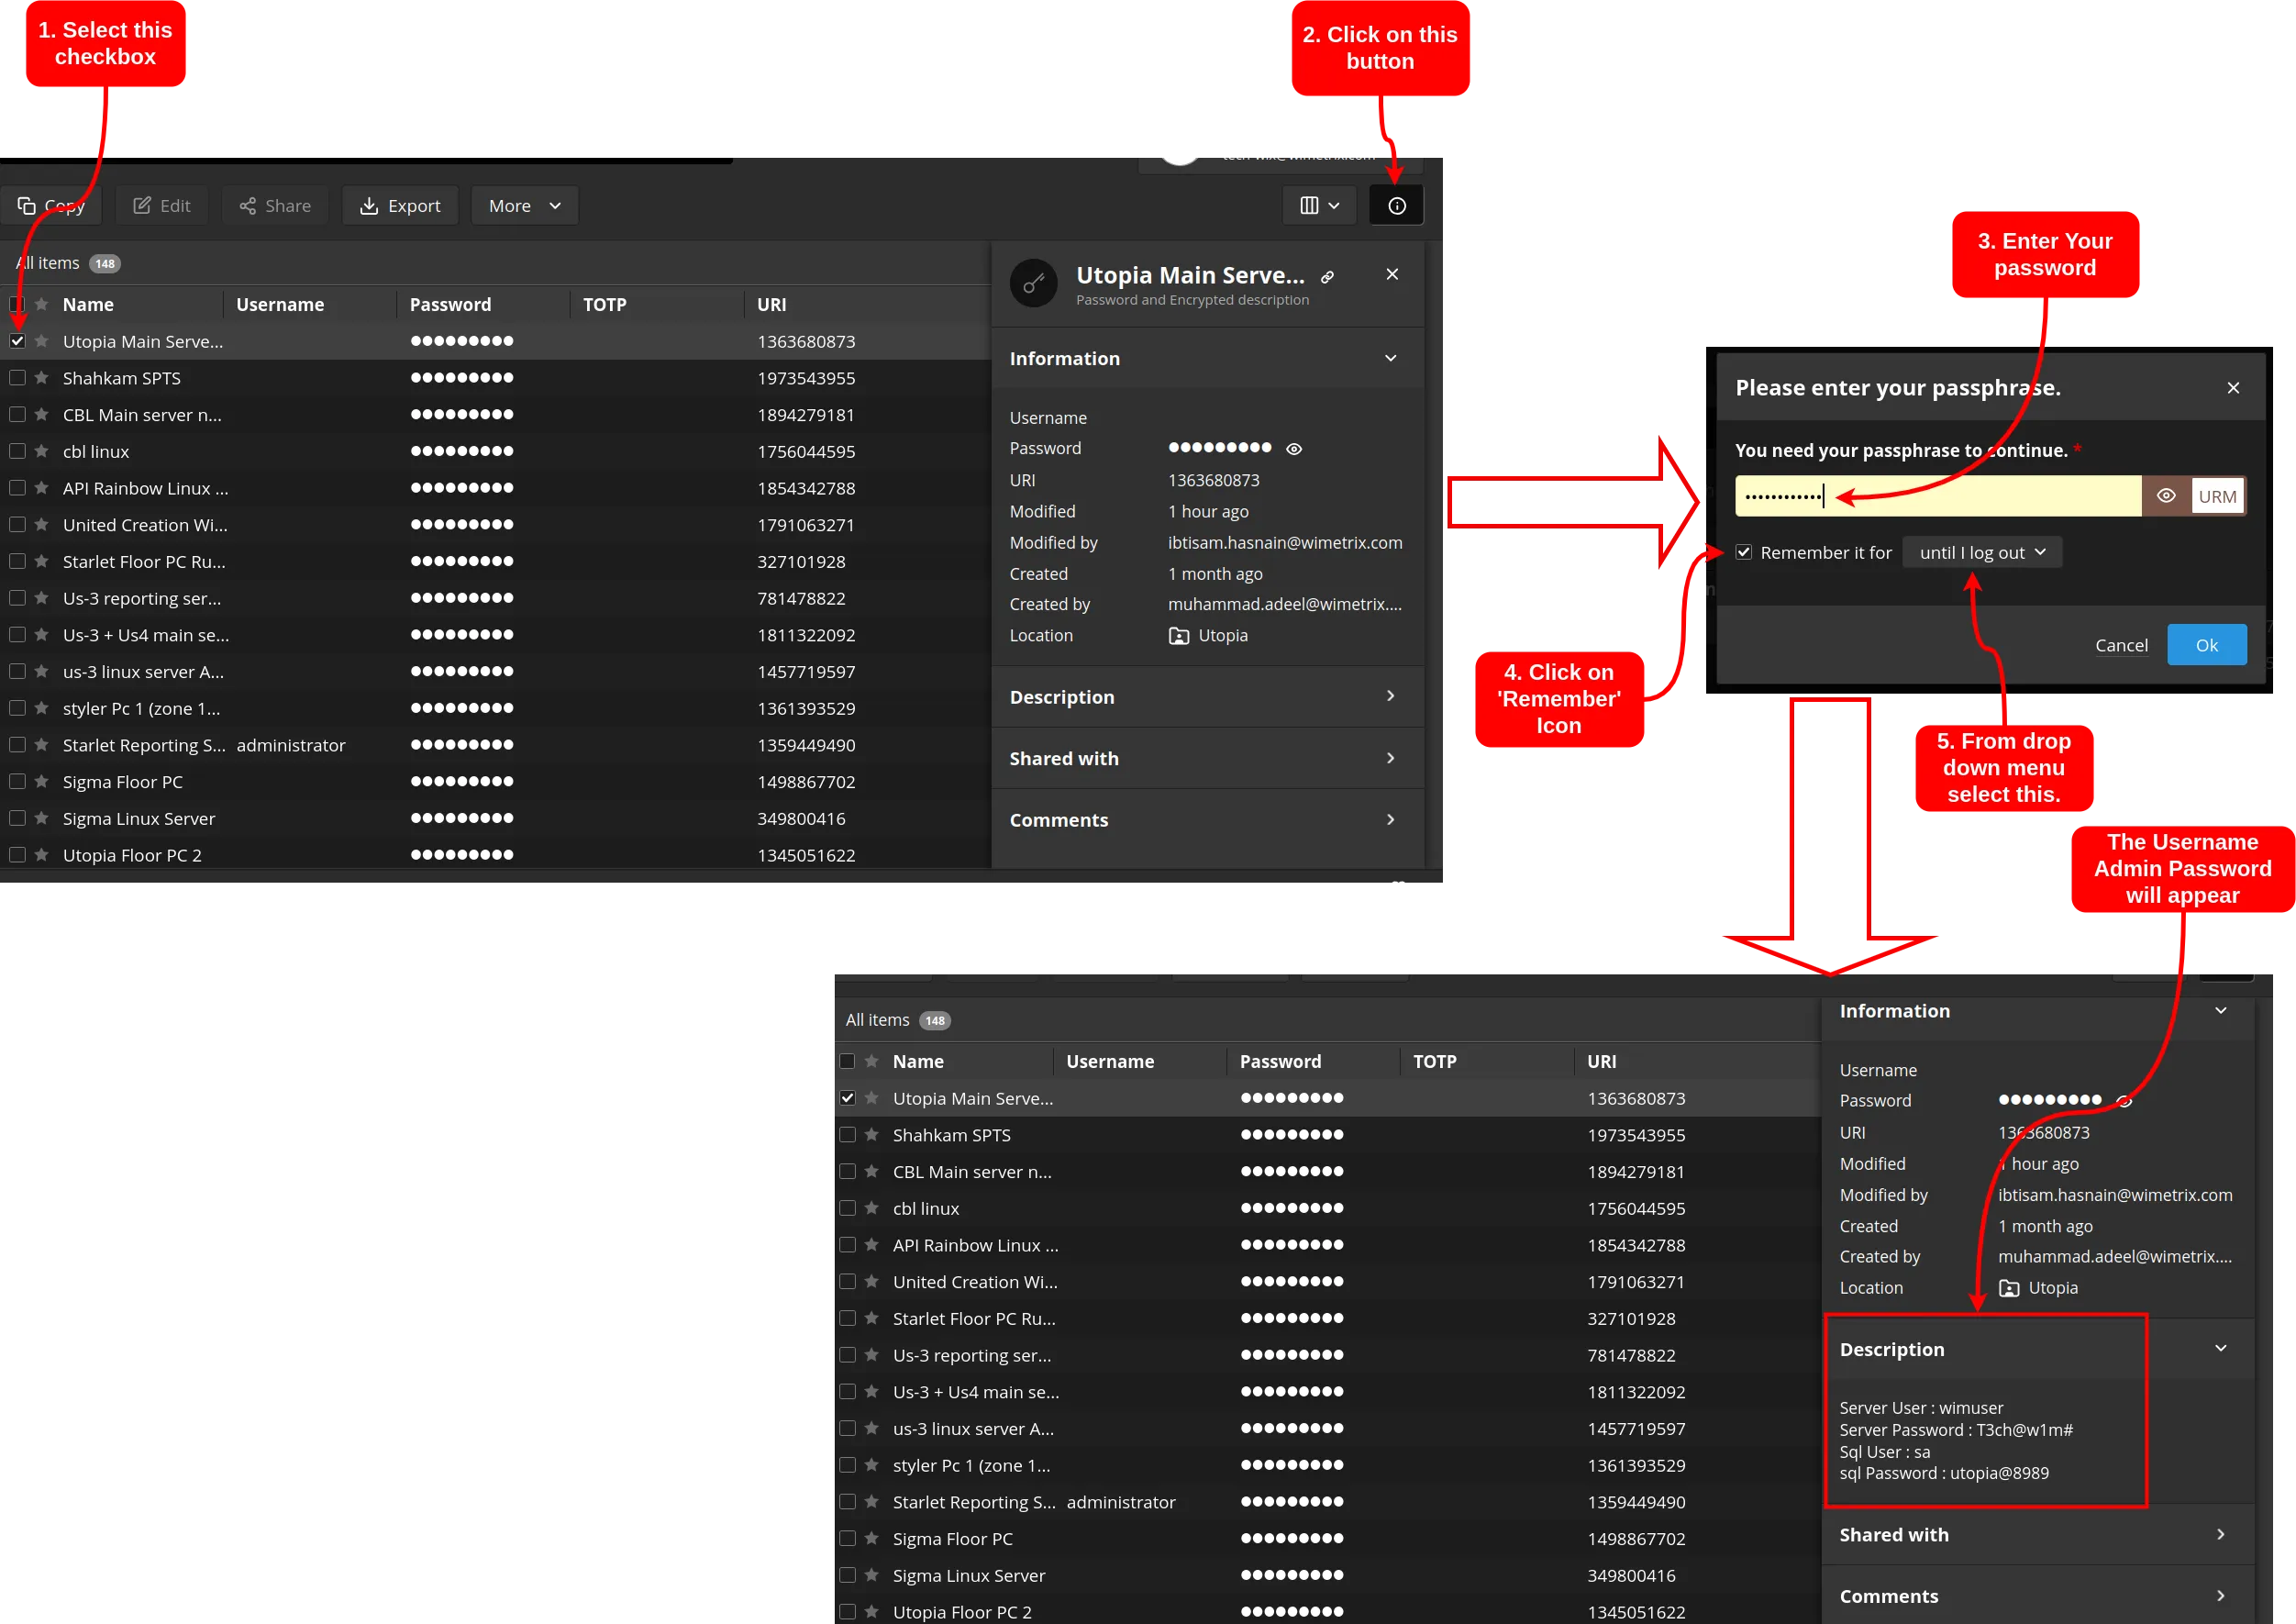
To access the Server Internal Admin username and password:
-
First, click on the checkbox on the right side of the password.
-
Click the Info(🛈) icon from the right side of the screen to open the details page.
-
Click on
Description. -
It will ask for your
Passphrase. Enter your passphrase and click onRemember it forand from the drop-down menu selectUntil I log out. -
Click on
OK. -
This will keep your session active and it will not ask again when you try to copy the password.
-
The description section will open and you can see the Server admin credentials.
Add New Credentials for the Client
Section titled “Add New Credentials for the Client”To add new credentials, such as AnyDesk username or password, or any other organizational credentials that you want to share with other colleagues, you need to create them in the client folder so they can be accessible to anyone. If you need to create a new folder for a new client, make sure to share that folder with aws-admin@wimetrix.com and make that user the owner of the folder. After that, ask a DevOps team member to give access to this folder to other teams. For that purpose:
-
Click on the
Createbutton on the right side of the dashboard. -
Click on
New Folder. -
Provide the
Foldername and click onSave. -
You will be redirected to the folder.
To share the folder with Admin:
-
Click on
Shared With. -
Click on the Pencil Icon(✎) to edit the shared permissions.
-
A popup box will appear.
-
Enter the email
aws-admin@wimetrix.comand clickSave. -
After that, ask the DevOps team member to share it with the rest of the team.
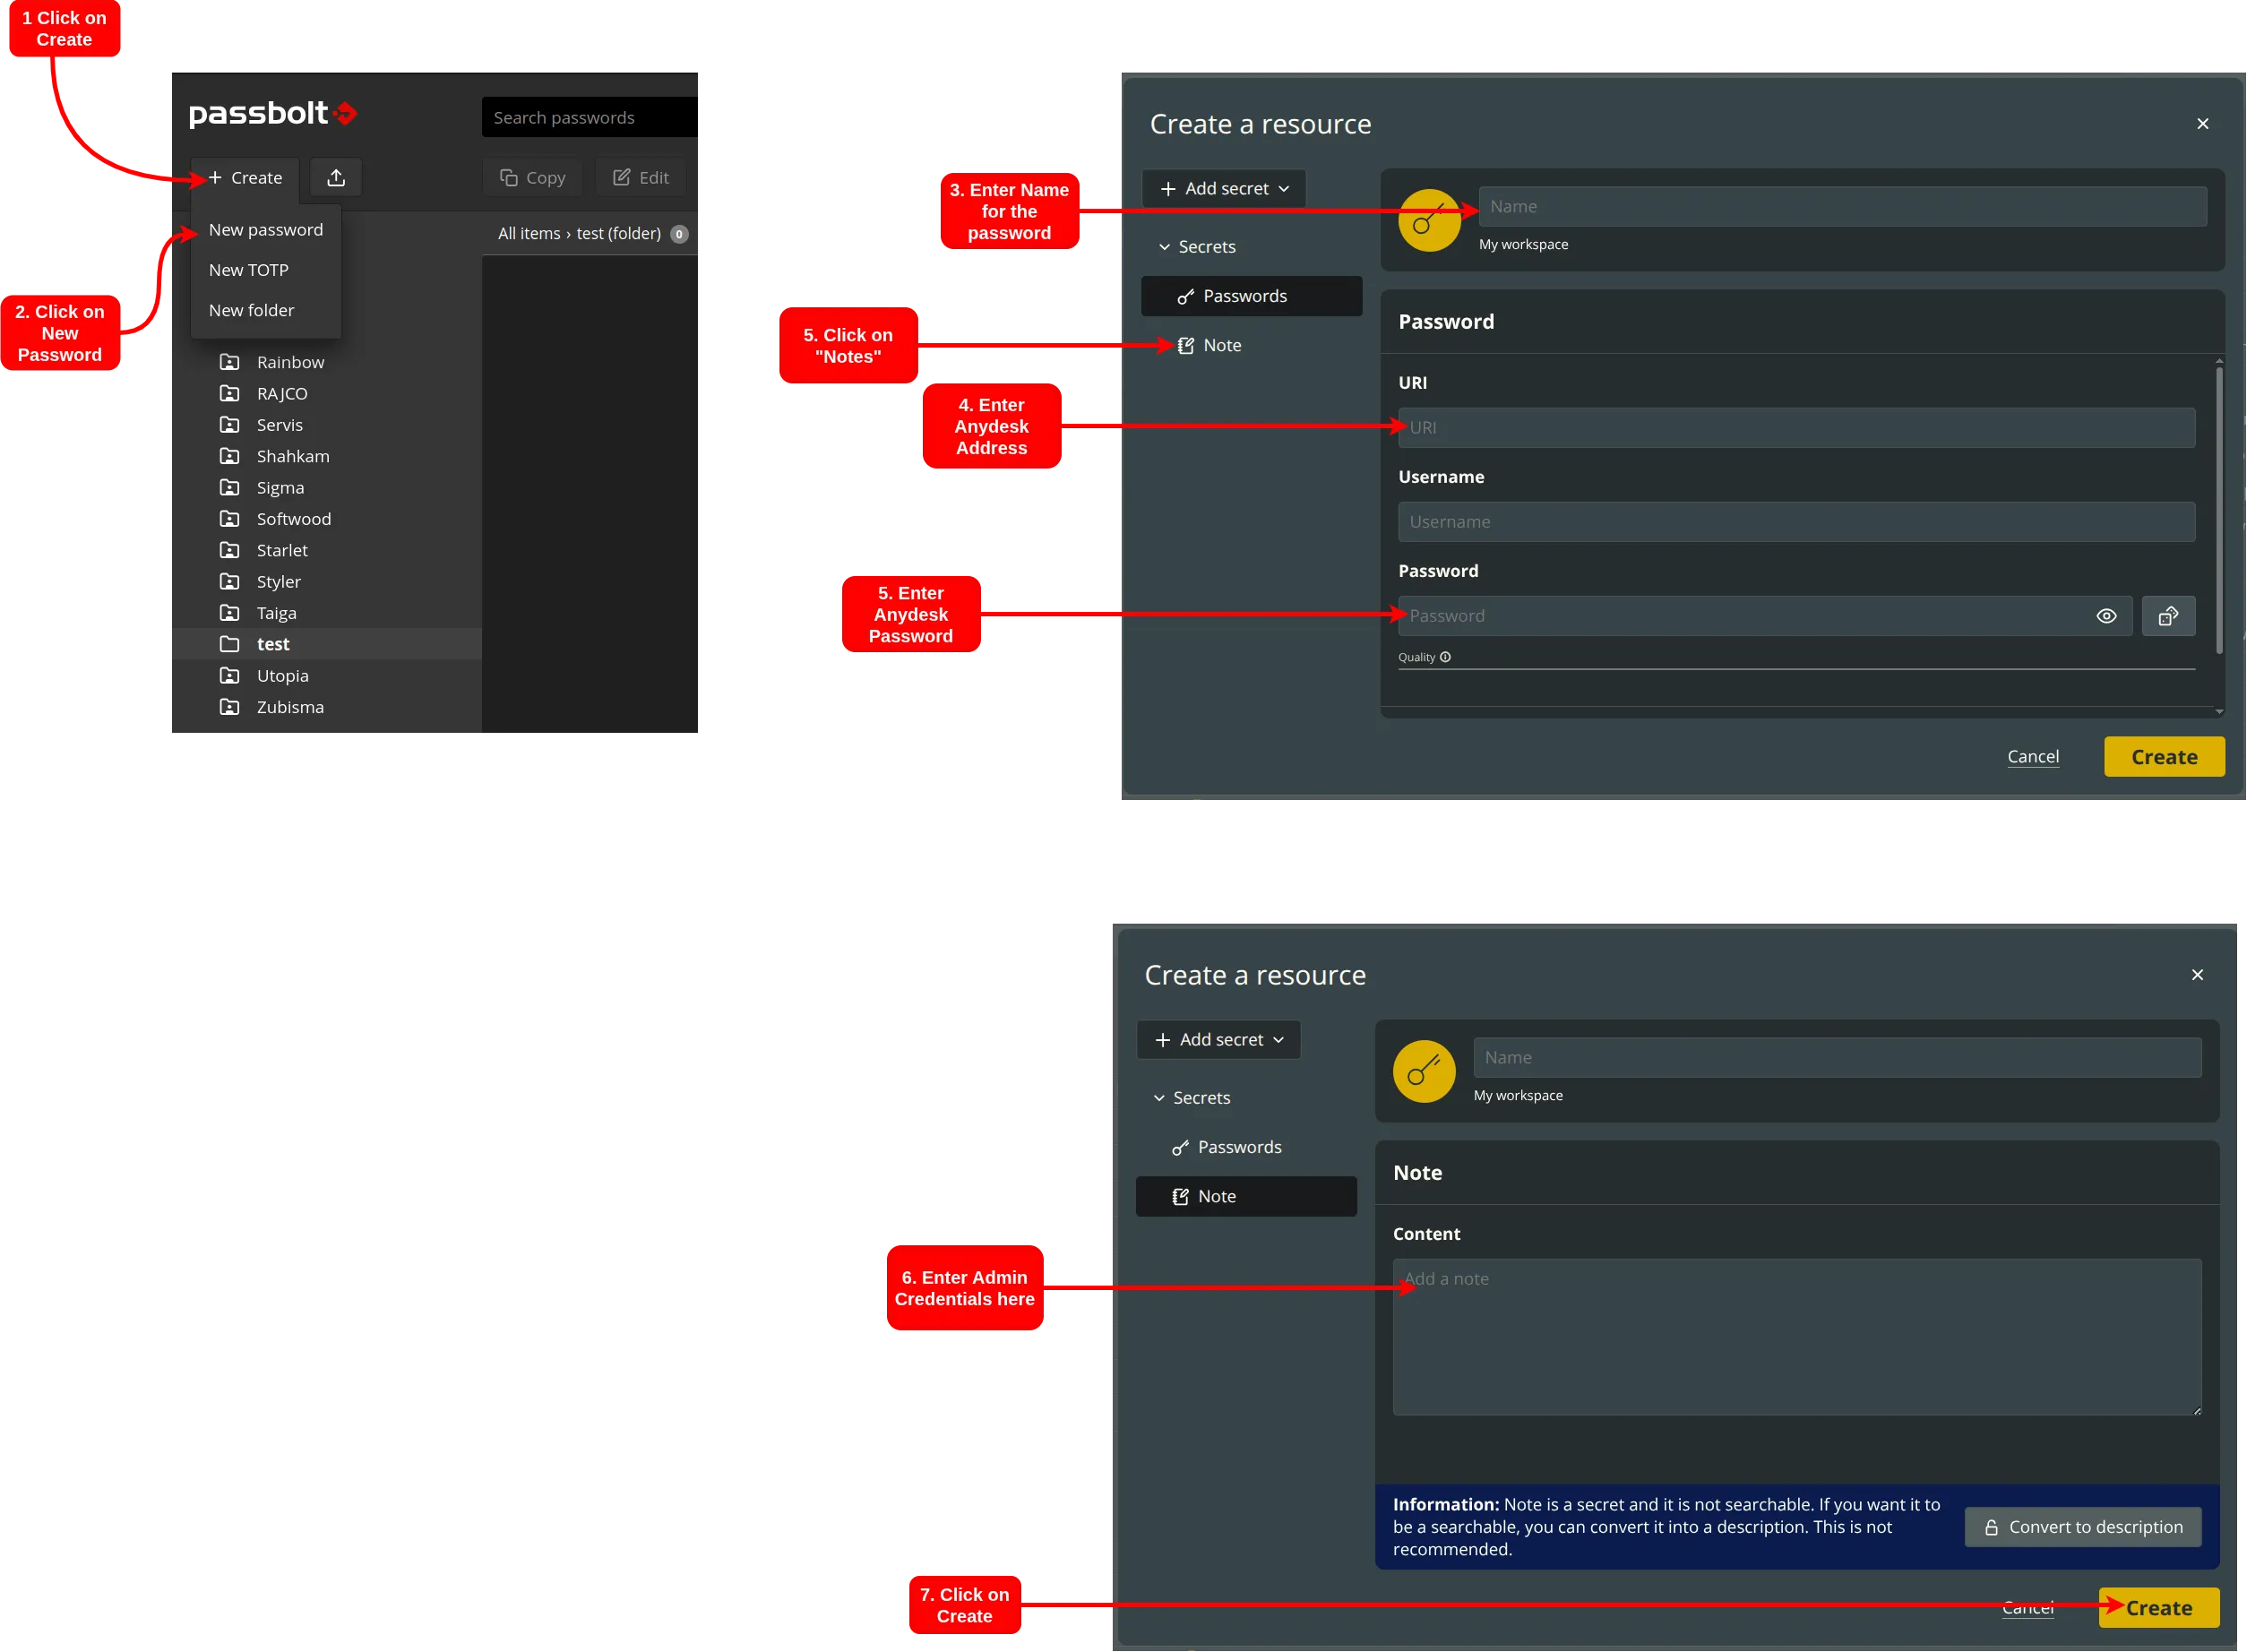
To create a new password:
-
Click on
Createfrom the left side of the menu. A dialog box will appear. -
Enter the
NameandURL. -
In the case of AnyDesk, enter the AnyDesk address.
-
Leave the
Usernamefield blank for AnyDesk. Enter the AnyDesk access password in thePasswordfield. -
In the
Descriptionfield, enter any additional details. Check the format below for details.
Server:  Username:  Password:
SQL Server:  Username:  Password:  Port:  IP address: