Floor PC Deployment
Introduction
Section titled “Introduction”This document is intended to serve as a guideline on how to deploy the necessary SooperWizer components on the floor computers.
The following components are deployed on the floor computers:
- SooperWizer API
- TiZnp
SooperWizer API Deployment
Section titled “SooperWizer API Deployment”SooperWizer Scanning API is a Python based API server written with FastAPI.
The API server is responsible for receiving scan data from the smart boxes and storing it in a database.
This document is intended to serve as a guideline on how to deploy for scanning.
Setup and Installation
Section titled “Setup and Installation”There are some prerequisites that needs to be satisfy before setting up environment:
- There should be a separate machine with ubuntu setup on it.
Floor PC'swith controller attached to them.Floor PCs` and server should be able to ping each other.
After completing above steps you can work on setting up server and clients using following steps:
-
First you need to install following packages:
ansible,ssh. ansible: should be setup on server. ssh: server should be able to do ssh connection tofloor PC's -
To Setup ansible and ssh on server just clone this repository ansible-deployment using command:
git clone https://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@github.com/WiMetrixDev/ansible-deployments.git. You need git installed on server. To install git run following command:sudo apt install git -
Go to the clone repository using
cd ansible-deployments. make script executable using commandsudo chmod +x install_prerequisites.sh. Now run the script usingsudo ./install_prerequisites.sh. This will install all the necessary tools and packages. -
Now go to the
inventoryfile and open it in text editor and edit thelinuxserverline.ansible_hostshould be localhost,ansible_ssh_useryou need to pass the server username, foransible_ssh_passadd the server sudo password, foransible_sudo_passpaste the same password,zone_idyou need to confirm from embedded team or you can pass the random number, fornode_nameshould beserver. After editing theinventory filesave it. -
First you need to install
dockerand required packages on server. For that purpose there are two ansible scripts nameinstall_docker.ymlandinstall_docker_new.yml. The difference between them is simple: for ubuntu version20.04 or olderyou need to useinstall_docker.ymland for ubuntu version22.04 and neweryou need to useinstall_docker_new.yml. Forinstall_docker.ymlyou need to change thehostsin the script. for that purpose openinstall_docker.ymlin text editor and changehosts: NCL3tohosts: server. -
After knowing your operating system version you can run the command
sudo ansible-playbook script_name.yml - inventory.<script_name.yml>can beinstall_docker.ymlandinstall_docker_new.ymldepending on your operating system version. -
This will install docker and required packages.
-
After that you need to setup portainer.
-
For Portainer there is only one script named
deploy_portainer.yml.Firstly, you need to change thehosts: NCL3tohosts: serverin this script also. After that you can execute that script usingansible-playboot deploy_portainer.yml -i inventory. After Completing it will show the message which contains admin password for the portainer.
-
Use your preferred browser to go to address
http://localhost:9000and portainer login screen will appear.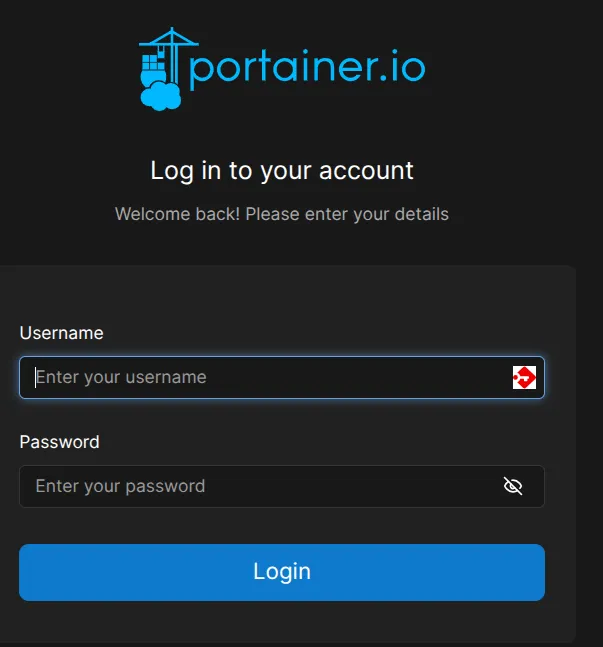
adminand passwordadmin@331122. -
Now you need to clone the repository
sooperwizer_apiinto the same folder. For cloning the repository usegit clone -b default-v1 https://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@github.com/WiMetrixDev/sooperwizer_api.git. There are two branches nameddefault-v1anddefault-v2. In most cases, we usedefault-v1because it contains the latest code. However, in some instances, when requested by the embedded team, we clone the code fromdefault-v2. -
First, you need to update some credentials in the
sooperwizer_api. Navigate to the clonedsooperwizer_apidirectory and edit thedocker-compose.ymlfile. Modify theenvironmentsettings to match the current client credentials.sooperwizer_api:container_name: sooperwizer_apibuild: .ports:- "8000:8000"volumes:- .:/appenvironment:SQL_DIALECT: "mssql+pyodbc"SQL_USERNAME: "sa"SQL_PASSWORD: "admin@3311"SQL_HOST: "sqlserver"SQL_PORT: "1433"SQL_DATABASE: "SooperWizer"SQL_DRIVER: "ODBC Driver 18 for SQL Server"TEST_SQL_DATABASE: "NA"SQL_REMOTE_DB: "NA"SQL_REMOTE_DB_HOST: "NA"SQL_REMOTE_DB_PASSWORD: "NA"SQL_REMOTE_DB_USER: "NA"SQL_REMOTE_DB_PORT: "0"SQL_LOCAL_SCANNING_DB: "NA"TZ: "Asia/Karachi" -
Additionally, update the configuration to match the credentials at the end of the same file,
docker-compose.yml.mssql_exporter:container_name: prometheus_mssql_exporterimage: awaragi/prometheus-mssql-exporterenvironment:USERNAME: "sa"PASSWORD: "admin@3311"SERVER: "sqlserver"TZ: "Asia/Karachi" -
Return to the main directory
ansible-deploymentsand change thehosts: NCL2configuration instart_sooperwizer_api.ymltohosts: server. There are two scripts:start_sooperwizer_api.ymlandstart_sooperwizer_api_new.yml. Usestart_sooperwizer_api.ymlif your Ubuntu version is20.04or older. Usestart_sooperwizer_api_new.ymlif your operating system version is22.04or later. -
To run the script, open the
Terminaland executeansible-playbook script.yml -i inventory. Replacescript.ymlwith eitherstart_sooperwizer_api.ymlorstart_sooperwizer_api_new.ymlaccording to your operating system version. -
This will complete the deployment on the server side.
TiZnp Deployment
Section titled “TiZnp Deployment”TiZnp is a lower end application that is use to run on Floor PC which is being used as a controller device to control
all the scanning devices.
Installation
Section titled “Installation”We can deploy everything on Floor PC using the Server which we have setup in sooperwizer_api guide. You just need ssh setup
on floor pc and Server can ping the floor pc. After making sure these conditions are satisfied Follow these steps:
-
First you need to edit the
inventoryfile. In theinventoryfile go to[nodes]section and edit the first node. First enter the node name in place ofqa, foransible_host=you can remove the existing ip address and enter the floor pc ip address.ansible_user=you will enter the floor pc username and inansible_ssh_pass,ansible_sudo_passenter the user password for floor pc. Forzone_idyou can define some number or you can ask embedded team aboutzone_id.node_nameshould be floor pc name andcompany_idshould be company name. -
After completing above steps you need to clone the
TiZnprepository. Rungit clone -b branch_name https://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@github.com/WiMetrixDev/TiZnp-gateway.git. Thebranch_nameshould beZStack-3orZStack-Mesh. For the new client or latest application we deployZStack-3and for older clients we deployZStack-Mesh. For the confirmation asks the embedded team which branch we need to deploy. -
First, we need to install
dockerand deploy Portainer on the floor PC. To do this, edit thehosts: NCL3entry in eitherinstall_docker.ymlorinstall_docker_new.ymland change it to the node name previously added in the inventory file. -
There are two scripts available:
install_docker.ymlandinstall_docker_new.yml, depending on your operating system version. If the Ubuntu version is20.04or older, useinstall_docker.yml. If the operating system version is22.04or later, useinstall_docker_new.ymlon the floor PC. -
After selecting the appropriate script and editing the
hostssetting in the file, runansible-playbook script.yml -i inventory. Thescriptshould be eitherinstall_docker.ymlorinstall_docker_new.yml. This will install Docker and the necessary prerequisites on the floor PC. -
Once the above script has successfully executed, change the
hostssetting indeploy_portainer.ymland deploy Portainer usingansible-playbook deploy_portainer.yml -i inventory. -
After deploying Portainer, you need to edit some settings in the
start_TiZNP_service.ymlfile on the server. Open the file in a text editor and update theSERVER=entry to match the IP address of the machine wheresooperwizer_apiis deployed. Additionally, update theAPI_ENDPOINT=entry to match thesooperwizer_apiserver IP address. Adjust theTZ=entry according to the client’s time zone.- name: Creating environment filecopy:dest: /home/{{ansible_ssh_user}}/workspace/TiZnp-gateway/znp.envcontent: |PORT=3000SERVER=172.16.4.70API_ENDPOINT=sooperwizer_apiAPI_PORT=8000NATS_PORT=4222CLIENT={{ansible_host}}PRODUCER_TOPIC="znpproduceCONSUMER_TOPIC=lightsTZ=Asia/AmmanDEBUG=cc-znpZONE={{zone_id}}NODE={{node_name}}COMPANY={{company_id}} -
After completing all the above steps, run
ansible-playbook start_TiZNP_service.yml -i inventory. This will deploy the TiZnp service on the floor PC.